San Jose Cabinet Refinishing involves cleaning and repairing your cabinets’ wood surfaces before applying a new color. Stains enhance natural features and create rich color tones, while paints can give a smooth, modern look.
If you’re a DIY enthusiast, cabinet refinishing is a doable home improvement project. However, refinishing requires a lot of prep work and time commitment.
Cabinet painting can transform a kitchen and add a fresh, new look. However, if you’re planning to paint your cabinets, it’s important to consider the amount of work involved and whether or not this is a project that you want to take on yourself. This type of home improvement requires careful painting with a brush or sprayer, sanding between coats and the use of primer and taping off edges and walls – all of which can be intimidating for a homeowner to attempt.
The first step in the process is to clean the cabinets thoroughly. This should be done with a degreaser solution, such as Krud Kutter or trisodium phosphate (TSP), to ensure that all the oil and grease is gone from the wood surface. You should also clean the doors and drawer fronts. Once the cabinets have been cleaned, you can begin to sand them down for a smooth finish and to remove any existing paint. Once the sanding is complete, you can begin to apply the primer and finally the paint. It’s important to allow the paint to dry completely before reinstalling the cabinet doors and hardware.
If you’re planning on replacing the cabinet hardware, you’ll need to fill any holes with wood filler and sand lightly for a smooth finish. Depending on your cabinet’s style, you may need to re-stain the cabinets once the new paint has dried.
Before you begin to paint your cabinets, it’s a good idea to set up a workspace in the garage or a separate area of the house where you can leave the mess until the project is complete. Having everything piled up in the middle of your kitchen will make it difficult to cook or even get around.
It’s also important to have plenty of painters tape, good quality brushes and lots of the best paint. The best option is to use a water-based latex primer, although you can also use oil-based primers. If you’re using an oil-based primer, be sure to let it fully dry before moving on. If you’re unsure what to do, a professional painter can help you choose the right product and get the job done quickly and efficiently.
Staining
Staining is an easy way to give your cabinets a new look and create a more natural, warm feel in the kitchen. Unlike painting, staining doesn’t require extensive DIY experience or expensive tools. However, you do need to prepare the cabinets properly for a beautiful, long-lasting finish.
Before you start working on your cabinets, choose a color of stain that suits the style and design of your home. Then, consider the natural tones of your cabinet wood to make sure the stain will seamlessly blend in with it. It’s also important to sand the cabinet wood for smooth, even surfaces, but it’s not necessary for every surface area.
If you have previously stained your cabinet doors and drawer fronts, apply a wood conditioner to the surface to help the new stain adhere to it better. Let the conditioner dry before scuffing the surface with a metal scrubbie or lightly sanding the cabinets with 80 to 120-grit sandpaper.
Once the sanding is done, wipe the surface down with mineral spirits to remove any remaining residue. Make sure you’re working in a well-ventilated work space, either on the drop cloths in the kitchen or in the garage or outside if weather permits. It’s essential to do this because the sanding process releases volatile chemicals that you don’t want in your breathing zone.
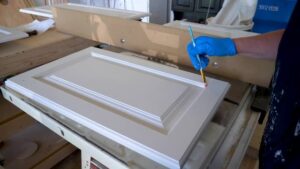
It’s important to follow the directions on your stain product and stir it with a wooden stick to combine all the ingredients. After that, dip your brush into the stain and begin to work it onto the cabinets. Use short, even strokes, applying the stain to flat sections first, then to bevels and textured areas. Always move the brush in the direction of the wood grain, and don’t forget to apply multiple coats to get a deep, rich stain.
Once the final stain is dry, you can seal it with a polyurethane sealant for additional protection and to help it retain its color over time. Then, your finished project will be a beautiful, durable addition to your kitchen.
Veneering
Veneering is a process of applying thin sheets of wood to the exposed cabinet surfaces not covered by doors. It is an ancient and skillful craft which dates back thousands of years. It allows for the use of exotic woods such as madrone burl that are normally very expensive and hard to acquire in solid form. It is also an environmentally conscious option that allows the utilization of less wood than a solid piece of the same species. It is also a cost-effective way to achieve a custom cabinet look without having to completely rebuild the existing cabinets and eliminates the need to replace internal hardware, shelves or interior storage elements.
There are many ways to cut wood into veneers and each method produces different grain patterns. There are three basic types of cuts: Rotary cutting, Sliced, and Quarter sawn. Each type of cut creates different types of grain patterns and is used for specific reasons.
The rotary cut is typically the most economical and is generally used for commercial manufactured furniture such as desks, tables or bookcases. The sliced or “fancy” woods like mahogany, walnut, maple, and cherry are commonly sliced to be incorporated into custom built furniture. Quarter sawn is usually only used for very figured or curved pieces of furniture.
When a cabinet is constructed with veneers the natural changes in grain pattern and color are minimized. The overall look is more uniform than a solid piece of the same species. There are several different methods of matching veneer leaves to create a cohesive panel. End Matching is a popular technique that utilizes two consecutive leaves with the next two flipped end to end producing a beautiful pattern that accentuates swirly grains and crotches. Random Matching assembles leaves randomly in the panel and visual continuity is not guaranteed.
Getting the right balance of a veneered panel requires a high degree of skill and a keen eye for detail. Getting it wrong is costly and can quickly turn a project into a nightmare. Generally, the larger the panel the more difficult it is to get the correct combination of matching techniques.
Refacing
Cabinet refacing is a great alternative to full kitchen remodeling and can provide a drastic aesthetic upgrade for much less than the cost of new cabinets. During a refacing project, cabinet doors and drawer fronts are removed and replaced with veneer that is custom made to match the design chosen during a consultation with a cabinet expert. New cabinet hinges and molding are then installed. Existing hardware can be reinstalled, or new handles and pulls can be added.
Before refacing, it is important to inspect the existing face frames for signs of damage or rot. Damaged face frames should be repaired or replaced before starting a refacing project as they can affect how well the doors and drawer fronts adhere to them. Additionally, damaged frames can make it difficult to anchor new cabinet hardware properly.
To prepare the face frames for refacing, they are lightly sanded and filled with wood putty to remove any major scratches or gouges. It is also a good idea to wipe down the entire surface of the frame with mineral spirits to ensure it is clean and free from dirt and grease. This will also help the adhesive used for refacing stick better.
The next step is to install the refacing materials, which is usually done by a professional installer who can choose from many different types of cabinet veneer kits. The installer will take measurements and apply the material using a special adhesive that is more durable than regular glues. After the refacing is complete, the installer will screw in the new cabinet hardware and your kitchen will look brand new!
While cabinet refacing is less expensive than a total kitchen remodel, it may not be the right option for you if you need to change the layout of your cabinets or add more storage space. You can, however, add storage solutions such as custom pull-out shelves or lazy susans to your cabinet refacing projects.
If you would like to learn more about our cabinet painting and refacing services, give us a call today! We would be happy to answer any of your questions and can even send a designer to your home to help you decide what options are best for your kitchen!