Author: Ana Porter

How Roofing Installation Works

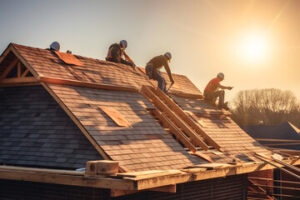
When roofing installation begins, the contractor will cover sensitive areas around your house and yard with tarps and wooden boards to protect plants and keep debris from falling. They will also set up a dumpster to dispose of old roofing materials.

Roofing

A quality roofer will use flashing in leak-prone spots around chimneys, vents and joints. They will also waterproof the valleys, which are where different sections of the roof meet. Contact Missoula Roofing for professional help.

Choosing the right material is important because it will affect the overall cost and durability of your roof. Different materials offer different aesthetics, price points and lifespans. Roofing professionals will help you select the best material for your budget and goals.

The type of material you choose will depend on whether the roof is new construction or replacement. A new roof offers more options in terms of style and design, while a replacement will be limited by the size, pitch and composition of the existing roof structure.

When selecting a roofing material, it is important to consider the climate and weather patterns in your area. For example, if it rains a lot in your area, you might want to choose a waterproof material or one that can be slanted to allow water and snow to slide off the roof easily. In addition, if there is a lot of humidity in your region, you may need to choose a material that can resist mold, mildew and other growths.

Asphalt shingles are the most popular residential roofing material because they are affordable and easy to install. They come in a variety of colors and styles that can complement any home.

Another option is tile roofing, which can add a dramatic look to your home. However, this type of roof is heavier than asphalt shingles and requires more extensive framing to support the weight. Also, it is difficult to repair and replace a tile roof.

Metal panels are another durable roofing option. They are available in a wide variety of shapes and sizes and can be customized to fit any roof. They are also fire resistant and easy to maintain. However, metal panels are more expensive than other roofing materials and require a professional installation.

If you have a flat roof, the contractor will install underlayment and felt paper to protect the insulation boards from moisture. Then, they will begin laying the shingles in rows, starting at the eaves and working up to the peak. The shingles are secured with nails that are closer together near the edge and spread out more towards the center. Flashing is then installed where the roof meets the slopes to prevent leaks.

Nails

Roofing nails are used to fasten shingles and other roof materials. They are available in a variety of lengths and gauges, and are made of different materials to meet the specific needs of each type of roofing project. For instance, roofers often use ring roofing nails that are made of hot-dipped galvanized steel and are 12-gauge or thicker for optimal performance. These nails have wide heads that allow them to grip shingles and other materials securely.

The nail material is important because it affects the overall strength and longevity of the fastener. For example, aluminum nails are commonly used to secure asphalt shingle roofs because they’re inexpensive and easy to purchase. But they’re also prone to corrosion, which makes them less durable than other roofing nail options. On the other hand, stainless steel nails are an excellent choice for damp or humid environments because they’re resistant to rust and corrosion. They are often preferred by roofers for projects involving slate or ceramic tile because they can handle the weight of these heavier tiles.

Additionally, some types of nails are more suitable for securing felt underlayment than others. For example, you want to avoid using smooth shank nails because they lack the holding power needed for roofing. Moreover, the holes left by these nails will allow water to seep through the roof. To prevent this, use roofing nails that have plastic caps for heads instead.

Moreover, it’s a good idea to use roofing nails that are half an inch longer than your typical nails because they can pierce through more layers of shingle. You can also opt for galvanized or stainless steel roofing nails that have a zinc coating. The zinc layer helps to protect against rust and corrosion. Lastly, copper nails are a smart option for slate and copper metal roofs. They naturally resist rust and corrosion and they develop a protective patina over time. These nails are more expensive than galvanized or stainless steel roofing nails, but they’re worth the investment for projects involving copper accents.

Sealing

Before roofing installation begins, your contractor should have multiple protective measures in place. Tarps cover delicate areas like gardens and air conditioning units so that debris falls on them instead of your house, dumpsters are delivered to hold the old material, and wooden boards are used to cover things like patio furniture or a pond to keep them from getting damaged during the tear off process.

The first row of shingles, called a starter strip, is installed with the self-sealing adhesive side facing up along the eave. This creates a strong, waterproof seal that protects the underlayment and shingle tabs from water intrusion.

All roof penetrations are sealed, including the gable vents for sewer ventilation and the curve vents that ventilate bathrooms and kitchen ranges. The roof valleys are also waterproofed with underlayment and felt paper. These are the areas that slope in a “V” shape and get a lot of water running through them.

During this phase, the hammering from the roofers can cause items to fall, so you should remove pictures and decorative items hanging on walls and ceilings. You should also turn off any alarm systems that are located inside your home, as the movement and vibration from the hammers can activate them.

Increase Your Home’s Value With Landscaping

Landscaping is the process of changing the features of your yard to improve appearance and prevent soil erosion. It involves planting trees, shrubs, and grass and building hardscape features such as patios, decks, retaining walls, and fences.

Landscaping

It also requires regular maintenance such as mowing, weeding, trimming, and pruning. With proper planning, you can create a landscape that meets your needs and is easy to maintain. Visit https://www.primecutlawnky.com/ to learn more.

Landscaping is an investment in your home’s value that can increase its resale value and make it more attractive to prospective buyers. According to the Appraisal Institute, a well-maintained landscape can increase a home’s value by 6 to 14%. In addition, it can reduce the cost of heating and cooling by shading the house during the summer and insulating it from cold temperatures in the winter.

The most obvious benefit of landscaping is the visual appeal it can add to your home. It’s important to remember that first impressions are everything, especially when it comes to real estate. A home with a beautiful, well-maintained landscape will be more appealing to potential buyers and can help you sell your property faster.

There are many different types of landscaping projects that can increase your property value. Some are more costly than others, but all of them can improve your curb appeal and make your home more appealing to buyers. Some of the most popular landscaping projects include adding trees, laying down patios or decks, and installing decorative features such as fences or water features.

A professional landscaper can create a custom plan that meets your unique needs and will maximize the value of your home. They can also provide recommendations on how to best maintain your property and keep it looking its best.

Curb appeal is one of the most important aspects of landscaping, and it’s the first thing that potential buyers notice when viewing your home. A simple lawn mowing, replacing faded mulch, pruning shrubs, and removing dead vegetation can have a huge impact on your home’s curb appeal.

Another way that landscaping can increase your home’s value is by saving you money on utility bills. A well-maintained landscape can lower the costs of heating and cooling by shading your home during the summer and insulating it from the cold in the winter. Additionally, carefully placed plants and trees can act as a buffer and block out noise and unwanted views.

Many homeowners wonder whether landscaping will affect their property taxes. Property taxes are based on the assessed value of your property, which includes both land and buildings. Therefore, it’s important to understand how landscaping can affect your property tax assessment before making any significant investments in your outdoor space.

Increases Value of Your Home

Landscaping is an excellent way to increase the value of your home. It enhances curb appeal and creates a pleasant environment for families, friends, and guests to enjoy. It also helps to protect your property from environmental hazards. For example, plants can help to reduce soil erosion and keep water away from foundations and other areas of the house. Additionally, trees can provide privacy and security. Landscapers can help you choose the best plants and shrubs for your area.

Many homeowners believe that a beautiful garden will attract potential buyers and increase their chances of selling the home quickly. However, there are actually a number of other benefits to landscaping that go beyond just increasing the value of your home. Some of the other benefits include environmental, social, psychological, and physical.

The first thing that a buyer notices about your home is the landscaping. This is why it is important to make sure your landscaping is well-maintained. Some of the most popular landscaping projects that increase property value are tree planting, walkways, and patios. These projects are relatively inexpensive and can add a lot of value to your home.

It is important to remember that your landscaping should complement the architecture of your home. If you have stone on your exterior, try to incorporate this into your landscaping design. This will ensure that the landscaping and the hardscaping flow together seamlessly.

Proper landscaping can improve the quality of your air by removing pollutants and reducing greenhouse gases. It can also help to lower your heating and cooling costs by shading your home in the summer and protecting it from freezing winds in the winter.

A properly maintained yard can improve your quality of life by lowering stress levels. Research has shown that spending time in nature can reduce anxiety and depression. Moreover, it can improve attention and memory. In addition, it can help to lower blood pressure and heart rate. If you want to improve the health and happiness of your family, then consider investing in professional landscaping. It will be worth the investment in the long run.

Creates Additional Living Space

A well-designed outdoor living space allows you and your family to enjoy your home and entertain guests year round. It also increases the amount of time you spend outdoors and the activities you engage in.

Landscaping can include hardscape, softscaping, water features, lighting and maintenance. It is an art and science of creating aesthetically pleasing and functional outdoor spaces that add value to your property. A well-designed landscape will have a positive impact on the environment and provide benefits to people and wildlife.

The most important benefit that a landscape provides is an increased level of comfort and enjoyment for the residents of the home. Many homeowners feel that a backyard is an extension of their home and can serve as a relaxing place to unwind or socialize with friends and family. The design possibilities are endless and can be customized to fit any style or lifestyle.

Studies have shown that being surrounded by nature improves mental health. The presence of trees, gardens, and green spaces is associated with lower stress levels, lowered blood pressure, improved focus and attention, and enhanced memory. In addition, engaging in landscaping activities like gardening, pruning, weeding, and watering can be considered healthy exercises and help reduce stress and anxiety.

A properly designed landscape can reduce energy costs by shading your house in the warmest parts of the day. Trees are known as nature’s air conditioners and can cool a yard up to 6 degrees. They also reduce cooling bills in the summer and can funnel cool winter breezes toward your home.

The beauty of a well-maintained yard is obvious to potential buyers and will increase your chances of selling your home faster. If you’re considering making an investment in your home, working with a professional landscaping company is the way to go. The team at Puget Construction and Landscape can assist you in creating the yard of your dreams. Contact us today to learn more about our services and get started on your project!

Enhances the Beauty of Your Home

Whether you are looking for a formal or casual look, landscaping can create an appealing style. From trimmed hedges to a beautiful water feature, there are many options for you to choose from. When properly maintained, a landscape can provide year-round beauty to your property. In addition, it can enhance the aesthetic of your home and increase curb appeal.

Landscaping can also reduce energy costs by creating shade and blocking wind. For example, planting trees in front of windows can help lower the temperature inside the home in the summer and reduce your dependence on air conditioning. In the winter, a wall of trees can block out wind and prevent cold drafts from entering your home.

Another advantage of landscaping is that it can add privacy to your home. Planting tall, mature trees can provide shade and privacy for you and your family. Mature trees can also add value to your property and enhance the overall appeal of your landscape.

Many people enjoy spending time in their outdoor spaces. They may want to relax with a book, entertain friends, or simply enjoy the weather. Landscaping can create an oasis in your own backyard, providing a peaceful place to unwind and relax.

A well-maintained yard and attractive landscaping can give your home a boost in curb appeal, increasing the chances of getting a good return on investment when you are ready to sell. Additionally, prospective buyers are willing to pay more for a home that is professionally landscaped, both in the front and back yards.

A well-designed landscape is a reflection of your personal taste and style. It is a great way to express your creativity and show off your home’s unique features. Landscaping is an ongoing process and can be adjusted to meet your needs as they change. It is one of the few projects that will continue to benefit your home long after it has been completed. It is an investment in your home’s value and beauty that will last for years to come.

Drywall Installation Tips For the Do-It-Yourselfer

Drywall Installation is generally left to the pros, but this home improvement project can be handled by a do-it-yourselfer with some tips and tricks. Use the right screw length, off-set panels so seams don’t line up and take care when working around wiring or pipes to avoid puncturing them.

Drywall Installation

When nailing, use ring-shank drywall nails. They have a larger head than other types of nails and are less likely to tear the paper surface. For professional help, contact Drywall Installation Naperville.

Before starting to hang drywall, it’s important to clear the area where you’ll be working. Remove furniture, appliances and fixtures, and cover anything that cannot be moved with tarps or plastic sheets to protect it from dust and debris generated during the installation process.

Inspect the framing to make sure it is in good condition, free of rot or damage. Check the studs and joists to ensure that they’re straight, and add blocking between them where necessary to support drywall. Also, check the locations of outlets, switches and other fixtures to mark them on the framing. This will help you hang the drywall accurately and avoid unnecessary cutting later.

Before you start hanging drywall, prepare the area by cleaning and sanding any surfaces that will be exposed. Whether you’ll be painting or adding texture, these preparations will ensure a smooth and clean surface that looks great once the drywall is installed.

Unless you’re an experienced pro, it’s best to have the right tools for the job before you begin. Drywall requires precise measurements and positioning, so you’ll want a tape measure, a utility knife, a drywall square and a drywall saw to work with. It’s also a good idea to have a drywall mud spreader, a hammer and a sanding block or sandpaper handy.

Measure each sheet of drywall to determine its width. Cut it so that it is about a quarter-inch shorter than the measurement. This will give you a little extra room to maneuver the piece when positioning it on the wall or ceiling.

When it’s time to screw each sheet, use a drywall square and a utility knife to create a straight line for your screws along the top and bottom of each piece. This will help you save time by not having to measure and cut each individual screw, and it will ensure that your screws are placed evenly throughout the entire sheet.

When you drive in each screw, be careful not to break through the gypsum paper into the core. This can weaken the integrity of the drywall, and it will also cause the screw head to tear or puncture through the paper and reduce its holding power. When screwing into each row, always ensure that the screw is set in at least a few inches so it will not come loose easily.

Hang the Sheets

Drywall installation is a project that many homeowners can do themselves without incurring the expense of a professional. It’s a relatively simple task if you follow a few best practices. These tips will help you hang drywall like a pro and make the finishing stages much easier.

Start by wearing safety goggles, a dust mask and work gloves. Before installing your first sheet, mark the location of your cut with a T-square or other straight edge. Then score the front side of the wallboard with a utility knife, making your score fairly deep–at least 1/8″ (Image 1). Apply pressure to the drywall and it should snap along that line. Repeat with the remaining sheets of drywall, scoring and snapping as necessary. When you’re ready to install the next section, apply construction adhesive to the studs and joists before hanging your next sheet (Image 2). This step isn’t strictly required but it can help maintain flat walls over time.

The direction that you hang your drywall will play an important role in the quality of your finished product. Commercial jobs often require that the walls and ceilings be hung vertically, while residential projects can be hung horizontally. Choosing the right option will reduce the number of noticeable seams and add strength to the walls.

When you’re installing drywall, always sit the end of each board halfway over a stud. This ensures that the drywall will be properly supported and may even prevent cracks down the seams. It’s also a good idea to fasten each piece of drywall with five screws in a single row, evenly spaced across the face and into the joist or strapping member underneath. Always be careful not to screw too close to the edges of the drywall, as this can puncture through the paper and damage the core.

If you’re installing a light, outlet or door, be sure to account for them as you hang the drywall. Use a drywall saw to cut the openings, or use a spiral bit on a power drill to cut around them (Image).

As you complete each row, be sure to double-check that you’re accounting for windows, doors and other obstructions. This will avoid unsightly gaps that can’t be covered by baseboard trim when you finish the room.

Finishing the Walls

Drywall is a versatile building material that has replaced lath and plaster as the standard for walls and ceilings. It’s relatively inexpensive and DIY friendly. However, to create smooth walls and ceilings that are ready for paint or wallpaper, you need to do a bit of extra work. The best way to minimize the number of steps is to follow an orderly process and take your time.

Start by inspecting the space. Make sure you have enough space to maneuver in the room and check that electrical wires, plumbing, and vents won’t interfere with your drywall installation. Also, confirm that studs and joists are straight and aligned. If not, add blocking between joists. Finally, mark the locations of light switches, outlets, and fixtures on the studs to help you hang them correctly.

When you are ready to begin hanging drywall, set up your drywall lift or recruit a buddy to help you. It’s difficult to safely hoist a sheet by yourself and it will take more time to hang each piece. When you’re finished with one whole sheet, move on to the next before returning to the previous wallboards.

If you are hanging drywall to replace existing wallboards, use a full-length sheet to reduce the number of seams. Otherwise, you will have to seam two smaller panels together.

Once you have hung all of the drywall, drag a drywall taping knife across each joint to detect protruding nails or screws. Then tighten or reposition them to avoid future problems with nail-pops or loose joints.

For perimeter seams, apply a thin bed of compound with a 6-inch drywall taping knife. Press paper tape immediately into the mud, centering it over the joint. Apply a second coat of compound over the tape, using the same method. When this is dry, lightly sand the surface of the taped joint with a handheld pole sander.

For inside corners, you can use a corner tool for both outside and inside corners. This will create a cleaner, professional finish than simply applying compound by hand. Alternatively, you can use a drywall blade for corner bead and use a hand or utility knife to scrape off any excess.

Finishing the Ceiling

Before drywall became popular, interior walls and ceilings were created by placing plaster over wooden strips (called laths). Drywall requires less labor to install, but it still takes time for installation, curing, and finishing. Once completed, the drywall process moves your construction project from looking like a building site to a functional, livable space. Local regulations may dictate if you need a permit for your drywall replacement and installation.

As with the walls, begin your ceiling by prenailing and positioning the first sheet. As you work, mark the location of all studs with your stud finder. Be sure to offset the end joints of each row from those of the previous row by at least four feet. Also, use your stud finder to verify that the studs are on 16″ or 24″ centers. You can expect to run into some studs that aren’t on center, due to poor carpentry or previous drywall installs.

Once you’ve hung the first row, cut a full sheet of wallboard lengthwise to fill in any open spaces at the end of your run. Be sure to mate the finished edge with the opened edge of the last full row. Doing this eliminates the need for trimming and makes a stronger seam.

Repeat the process to hang the remaining sheets of drywall. When you reach the ends of your run, hang a single panel over any outlet and switch boxes. If the box is large enough, place the drywall over it. If not, you can shave down the drywall over the boxes with a utility knife, to avoid having to trim it later.

Before installing each new panel, check the drywall for levelness using a level and a tape measure. If the drywall isn’t level, it will take longer to complete the mudding and taping stages and may affect the quality of your finished paint job.

Once you’ve finished hanging all the drywall panels, use a tool called a screw gun to drive a line of five evenly-spaced screws through each panel and into the joists below it. Be sure to follow your stud marks, double-checking that each screw is deep enough to prevent pulling the drywall apart from its framing components.

Make Your Car Look Brand New With These Auto Detailing Tips

Auto Detailing

If you want to make your car look brand new, you need to know a few auto detailing tips. A good detailer can help you restore your vehicle’s value, as well as keep it looking and running its best.

Clay bar is one tool that can get rid of water spots, metal dust, road grit and more from the clear coat of your car. It will also prevent swirl marks and keep your paint job shiny and smooth.

1. Clean the Exterior

Auto detailing involves a thorough clean of the vehicle’s exterior that is much more extensive than simply washing and rinsing. This process is also called decontamination and it ensures that all surfaces are smooth and free from bound “contaminants” such as tar, iron fallout and tree sap. Decontamination can be done chemically using sprays or physically with a clay bar. Both methods are necessary to create a perfect canvas for protective waxes and sealants.

When it comes to cleaning the exterior of your car, it is important that you know what you are doing in order to avoid damaging your vehicle’s finish. The key is to always start with a high-quality soap that is specially formulated for cars. These products will not ruin your paint job and will help you achieve a beautiful shine. In addition, it is best to start at the top of the car and work your way down in order to avoid getting dirt on areas that you have already cleaned.

It is also recommended that you use a high-quality microfiber cloth to clean the surface of your vehicle. These cloths are specifically designed to be super soft and will not scratch the surface of your car’s paint. Using a cheap sponge or cloth can leave behind fine scratches that will be very noticeable on the surface of your vehicle’s paint.

Once you are finished with your wash, make sure to rinse thoroughly. This is especially important if you are working in direct sunlight. If you do not rinse your car properly, it can lead to water spots that will take a long time to remove. It is also a good idea to dry your car immediately after you have washed it. This will help prevent the formation of streaks and will also allow you to apply the protectant faster.

Lastly, make sure to use a quality glass cleaner that is specifically designed for automobiles. This product will not damage the clear coat on your vehicle’s paint and will help you to achieve a sparkling, crystal-clear shine.

It is important to remember that when it comes to car detailing, it is the little things that can make a big difference. By following these simple tips, you can ensure that your car looks like it came out of the showroom.

2. Clean the Interior

We all know that our cars can become disaster zones – empty drink containers, stray makeup bags, and discarded cleats are just a few of the many items that may end up in your car’s interior. To get your vehicle back to its pristine state, follow these quick and easy auto detailing tips.

Start by vacuuming the interior of your car. This will remove any large crumbs and other debris that could be hiding underneath the seats. If your car has cloth upholstery, be sure to use a fabric protectant after cleaning. This will keep your car’s fabrics looking and smelling new for years to come.

When you’re done vacuuming, go over the inside of your car with a damp microfiber cloth. This will remove any lingering dirt and grime, and it’ll also help to buff out any streaks that might be present.

It’s a good idea to wash your windows first. This will make it much easier to clean the rest of your car’s interior because you won’t be wiping water and cleaner all over the place. Make sure to use a glass cleaner that doesn’t contain ammonia.

Once you’ve washed your windows, wipe down the dashboard and console. You can also use this opportunity to clean the steering wheel, door panels, and pedals. Be sure to rinse your rag frequently and change it out when it gets too dirty.

If you’re having trouble getting into hard-to-reach areas, try using a compressed air duster. These are available at most hardware stores and are a great way to dislodge dust that’s stuck in your middle console.

After sanitizing the interior of your car, use a dry microfiber cloth to remove any streaks from your window and mirrors. This will ensure that you have a crystal-clear view while driving.

As you’re cleaning the interior of your car, don’t forget to clean the floor mats. This is a good time to remove them and shake them outside to loosen any dirt that might be embedded underneath them. Then, run them through the washing machine to get them clean and fresh again.

3. Clean the Wheels

The wheels of your car collect dirt, grime, brake dust, and road debris much more quickly than any other part of the vehicle. That’s why it’s so important to pay attention to them when cleaning your car. The last thing you want is to accidentally damage your beautiful new rims with an overzealous approach to scrubbing.

The best way to protect your wheels and rims is by applying a non-acidic wheel cleaner at the beginning of your detailing process, before you wash the rest of the vehicle. Apply the cleaner with a high-pressure hose, then allow it to soak for a few minutes before scrubbing it off with a soft brush. Don’t forget to scrub the crevices of the rims and spokes as well!

When scrubbing your wheels and rims, it’s also vital to use the right tools. Using household abrasives such as steel wool or dish scrubbers will quickly scratch and mar the finish of your wheels. Similarly, sponges are notorious for leaving swirl marks on the surface of your paint when used incorrectly. Invest in some microfiber cloths or towels that are designed to clean and dry your car without leaving any scratches or swirl marks.

Whenever possible, work indoors or in the shade. Hot surfaces and direct sunlight accelerate the drying of soap and water, leading to stubborn water spots and streaks on the surface of your car’s paint.

Another mistake that many people make when washing their cars is not properly rinsing the wheels and tire wells. This can lead to contaminants (especially degreasers and brake cleaner) splattering onto the freshly-washed panels of your vehicle’s body. This can permanently etch or damage those areas of your vehicle’s finish.

If you aren’t going to take the time to clean your tires and rims, don’t bother with the rest of your car’s exterior. At the very least, rinse the windshield, windows, and door trim with a hose and car wash soap, then towel dry them to prevent water spots from forming. Taking these simple steps will help to keep your car looking great for years to come!

4. Clean the Tires

Clean the tires and wheels first before you wash the body of the vehicle. This prevents overspray from washing onto cleaned panels. Also, it ensures that you’ve thoroughly cleaned the grit and caustic brake dust off the tires before they dry.

Scrub the tires and wheels with a strong degreaser such as Wolfgang Tire & Wheel Cleaner. This product clings to the surface of both the tire and wheel to loosen dirt that’s embedded in the pores of the rubber and to release trapped brake dust. Using a stiff brush, agitate the cleaner to help break up the brake dust. Rinse well with a high-pressure sprayer, being sure to rinse away the cleaning agent as well as the dirt and grime.

Be careful when you’re choosing a tire cleaner. Some products such as Armor All collect dirt and debris on the surface of the tire, which can cause discoloration and premature wear. Others, like Pinnacle Black Onyx Tire Gel, nourish the rubber to create a natural appearance and offer a protective seal.

When you’re washing the tires, always use a separate sponge and drying towel for this task. Tire and wheel cleaners can damage the paint if they come in contact with it. To protect the paint of your car, use a Microfiber All Purpose & Wheel Detailing Towel or a terry cloth towel that you only ever use for tires and wheels. Avoid old-style chamois towels that can leave water marks on the bodywork of your vehicle.

After you’ve thoroughly rinsed the tires, dry them with a Microfiber All-Purpose & Wheel Towel or terry cloth towel. This step helps prevent water spots and ensures that you’ve removed every bit of the cleaner from the surface of the tire.

Tires and wheels are the only parts of your vehicle that make contact with the road. So, they get dirty quickly and should be cleaned regularly. Doing so will prolong the life of your tires and keep them looking great.

Navigation